

If you’re building a new home, it’s crucial to understand one of the most important—and often overlooked—aspects of the entire process: wiring a new home. The right wiring ensures safety, energy efficiency, and long-term convenience. In this blog, I’ll walk you through wiring a new home: best practices for safety and efficiency, based on years of hands-on experience and insights from top professionals in the field.
Why Safe and Efficient Wiring Matters in New Homes?
Wiring isn’t just about powering your lights or appliances. It plays a key role in preventing fires, reducing energy waste, and supporting future technologies. A poorly wired home can become a hazard, while smart planning now can save you from expensive headaches later.
Creating a safe and efficient electrical system starts with understanding the key elements involved. From strategic planning to smart material choices, each step plays a critical role in long-term home safety and functionality.
-
Plan Before You Wire: Designing a Thoughtful Electrical Layout
Before a single wire is installed, planning is everything. Start with a detailed blueprint and walk through each room in your mind. Ask yourself: where will the bed go? Will there be a TV, a computer, or a coffee maker nearby? How many outlets will you need? Think in terms of zones—task lighting, general lighting, and ambiance lighting. Consider incorporating multiple switch locations for larger spaces. Also, plan ahead for specialized areas like a home theater, a home office with high power usage, or a kitchen with multiple countertop appliances. And don’t forget the garage—especially if you’re considering future EV charging.
-
Understanding Your Electrical Load and Circuit Needs
Every modern home includes a range of devices that draw power—sometimes simultaneously. Understanding your total electrical load helps prevent tripped breakers and fire hazards. Start by listing all your major appliances and estimating their amperage. Then, divide your wiring into dedicated circuits: HVAC systems, ovens, refrigerators, and even high-draw items like hair dryers or microwaves each need their own. A 200-amp panel is standard for most new homes, but you may want to go bigger to allow room for growth.
-
Permits and Code Compliance: What You Can’t Afford to Skip
No matter how skilled you are, permits and code compliance aren’t optional. Local electrical codes ensure that installations meet safety standards—and failing to follow them can lead to denied inspections, revoked insurance, or hazardous living conditions. Each jurisdiction has its own rules about outlet spacing, GFCI placement, arc fault protection, and more. Always schedule an official inspection after rough-in and again at final installation. These steps help catch oversights before they become serious problems.
-
Hiring a Licensed Electrician vs. Doing It Yourself
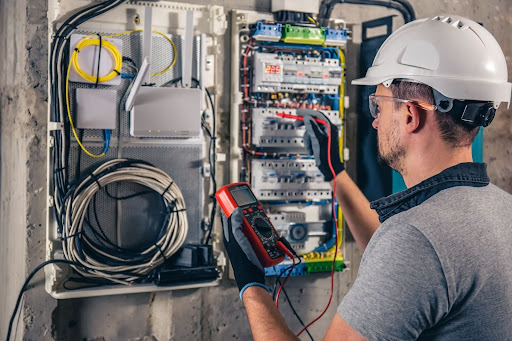
There’s no shame in DIY, but electrical work comes with high stakes. While running cable or installing boxes might seem straightforward, mistakes in load balancing or grounding can lead to fires, electrocution, or expensive repairs. A licensed electrician brings not just technical skills, but also an understanding of current building codes, safety protocols, and long-term durability. They’ll also guarantee their work, giving you peace of mind.
-
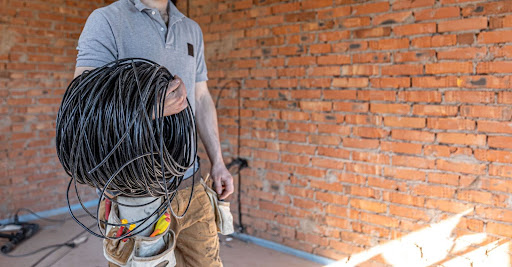
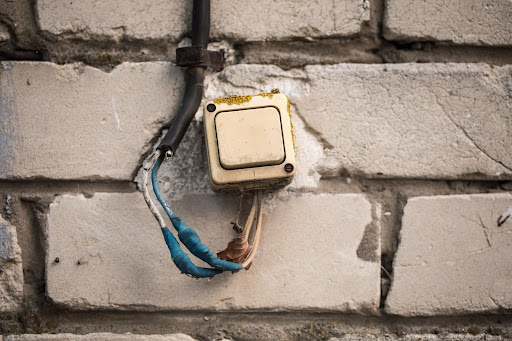
Choosing the Right Materials for Long-Term Reliability
It’s easy to be tempted by lower prices, but when it comes to wiring your home, quality matters. Copper wiring is more durable and conductive than aluminum, making it the better long-term investment. Use weather-rated boxes and connectors where needed, and install tamper-resistant outlets to protect children. Breakers should be chosen to match the load and wire size exactly. The materials you choose today can determine how safe and maintenance-free your electrical system will be for decades.
-
Room-by-Room Electrical Considerations for New Construction
Each room in your house serves a unique purpose and comes with specific electrical requirements:
- Kitchens: Require multiple circuits for high-load appliances like microwaves, dishwashers, and ovens. GFCI protection is a must near any water source.
- Bathrooms: Also require GFCIs and benefit from separate circuits for lighting, outlets, and exhaust fans.
- Living Rooms: Plan for entertainment centers with surge protection, recessed lighting, and perhaps USB outlets built into the walls.
- Garages and Utility Rooms: These often require higher amperage circuits for freezers, washers, dryers, and electric vehicle chargers.
-
Smart Wiring Tips: Future-Proofing Your New Home
When wiring a new home, you need to think beyond today’s needs. What technologies will you want in five or ten years? Pre-run conduit for future wiring upgrades, especially in walls that may be difficult to access later. Use structured cabling systems like CAT6 or fiber optic lines for data. Leave extra space in your electrical panel for smart thermostats, security systems, or solar power integration. A little foresight now avoids costly rework later.
-
Energy-Efficient Electrical Planning: Save Money and Power
A well-wired home is also an energy-conscious home. Start with LED-compatible dimmer switches and motion-sensor lights in low-traffic areas. Install programmable or smart thermostats to reduce heating and cooling costs. Opt for ENERGY STAR-rated appliances and think about whole-home surge protectors to prevent damage from power spikes. Incorporating these energy-saving strategies while wiring a new home means lower utility bills from day one.
Avoiding Common Wiring Mistakes in New Builds
Even with a solid plan in place, it’s surprisingly easy to make errors during the wiring stage—many of which only become apparent after the walls are sealed. Some of the most common mistakes I’ve seen include leaving no room for expansion in the electrical panel, which can limit future upgrades or require expensive rewiring. Overloading outlets in high-use areas like kitchens can lead to frequent tripping or overheating.
Another major issue is forgetting to wire for exterior lighting or security cameras—something many homeowners regret once they move in. It’s also common to place outlets in awkward or inconvenient spots, especially if you haven’t carefully considered furniture placement or daily routines.
Running too few circuits, using incorrect wire gauges, or making loose connections in junction boxes are additional oversights that could compromise safety. Finally, not labeling circuits properly from the start can make future maintenance a headache.
How to Label and Organize Your Electrical Panel Properly
Properly labeling your electrical panel is more than a matter of convenience—it’s essential for safety and long-term ease of maintenance. Start by assigning each breaker a unique and descriptive label using waterproof, printed tags. Avoid vague terms like “bedroom” or “kitchen”—instead, be specific: “Kitchen Counter Outlets” or “Master Bedroom Ceiling Fan.” Group the circuits logically, keeping all kitchen breakers together, all lighting circuits together, and so on.
Also, create a master list of circuits and tape it securely inside the panel door. This makes it easy to find the right breaker quickly in an emergency or during repairs. When someone else needs to work on the system—or if you revisit it years later—you’ll be glad you took the extra few minutes to stay organized. Trust me, your future self will thank you.
Conducting a Final Inspection Before You Close the Walls
Before the drywall is installed, perform a thorough check of all wiring. Walk room by room to verify that every outlet, switch, and fixture box is where it should be. Plug in a tester to make sure power flows correctly and there are no wiring reversals or open grounds. Look for loose connections or exposed wires, especially inside junction boxes.
Once your own testing is complete, schedule an official inspection with your local building authority. The inspector will check for code compliance, grounding quality, and safe routing. It’s much easier to fix an issue now than after the walls are sealed and painted, so don’t rush this step. A clean inspection is your green light to move forward confidently.
Routine Maintenance Tips for Newly Installed Electrical Systems
Even with brand-new wiring, a little maintenance goes a long way in keeping your system safe and functional. Schedule an annual check-up of your breaker panel—look for discoloration, heat marks, or signs of corrosion. These can indicate overloaded circuits or aging components. Reset your GFCI outlets monthly using the test and reset buttons to ensure they’re functioning properly.
Pay attention to the small signs: flickering lights, outlets that feel warm to the touch, or frequent breaker trips can all point to hidden issues. Don’t wait for a major failure—addressing minor problems early can prevent costly repairs and protect your home from electrical hazards.
Planning for Home Expansions or Renovations Later
If you think you might add a new room, upgrade to solar, or install a hot tub in the future, build with flexibility in mind. During initial construction, leave extra space in your electrical panel for new circuits. You can also pre-install conduit lines to areas that may eventually need power—like an attic, basement, or outdoor patio.
Label these lines and document them in your electrical plan, so future projects won’t involve unnecessary guesswork or wall demolition. This forward-thinking approach can save you thousands in labor and materials when you’re ready to expand.
What to Do If Something Goes Wrong: Troubleshooting Basics
Even with the best wiring practices, issues can pop up. If a breaker trips repeatedly, unplug everything on that circuit and test each device individually to isolate the problem. Make sure no outlets are overloaded with multiple high-wattage appliances.
Flickering lights, humming sounds from outlets, or burning odors are serious red flags. These could indicate a loose connection, an overloaded wire, or even internal damage. Don’t attempt to fix these issues yourself unless you’re trained and certified—call a licensed electrician immediately. It’s always better to be safe than sorry when dealing with electrical faults.
Frequently Asked Questions (FAQs)
What is the safest way to wire a new home?
Always follow local code, use copper wiring, and hire a licensed electrician if you’re unsure. Safety should never be compromised.
Can I wire a new house by myself?
You can, but I don’t recommend it unless you’re experienced and permitted. Electrical work isn’t the place to cut corners.
What’s the best wire type for new home construction?
Copper remains the gold standard for most applications due to its conductivity and fire resistance.
How much should I budget for wiring a new home?
Typically between $4,000 and $15,000 depending on your home size, wiring complexity, and smart tech add-ons.
How do I future-proof my home’s wiring?
Plan for smart devices, data cables, and EV charging. Leave extra space in your panel and install conduit where possible.
Wiring a New Home: Best Practices for Safety and Efficiency—Final Thoughts
Whether you’re building your dream home or overseeing a construction project, following wiring a new home: best practices for safety and efficiency is essential for long-term comfort, energy savings, and peace of mind. Take the time now to plan well, use quality materials, and work with certified professionals.